# User Manager
To manage local users and api users, Nimbus has a built in user manager.
If you using reverse proxy authentication, please refer to your authentication provider to create and manage interactive user accounts.
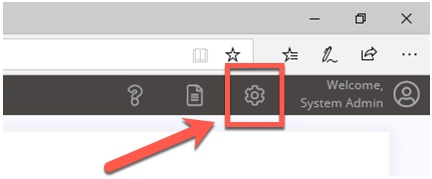
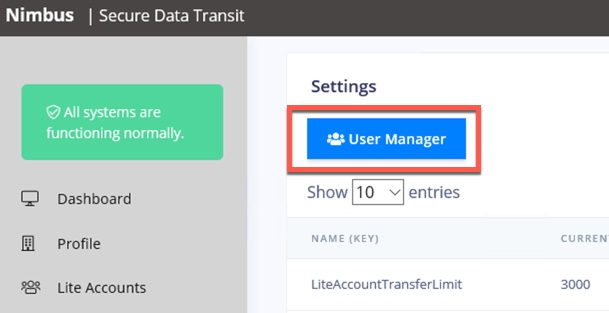
# Acessing the User Manager
Log in to the Nimbus UI.
Click the settings\cog icon in the top right of the screen.
Click the blue User Manager button.
# Creating a User
Click the blue Add User button
Fill in all the fields about the user. Leave the User Type set to "Standard User".
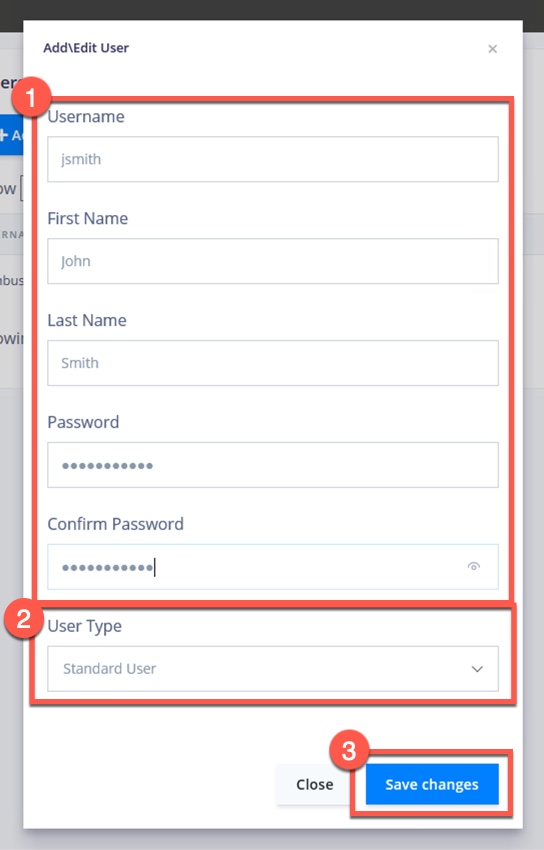
Click Save Changes
# Updating\Editing a User Account
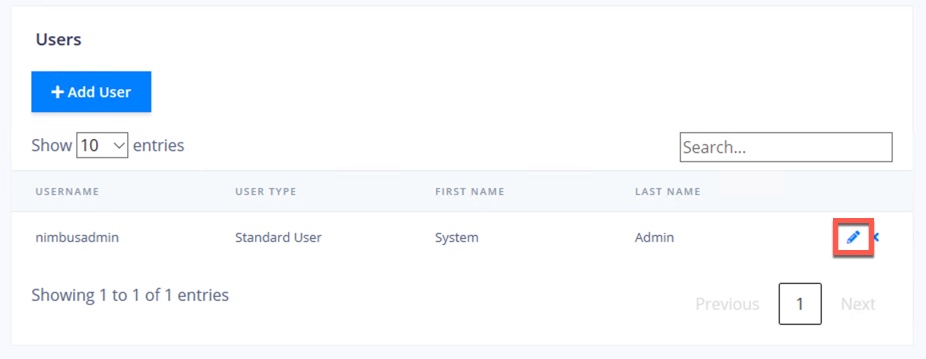
Search for the user you would like to edit.
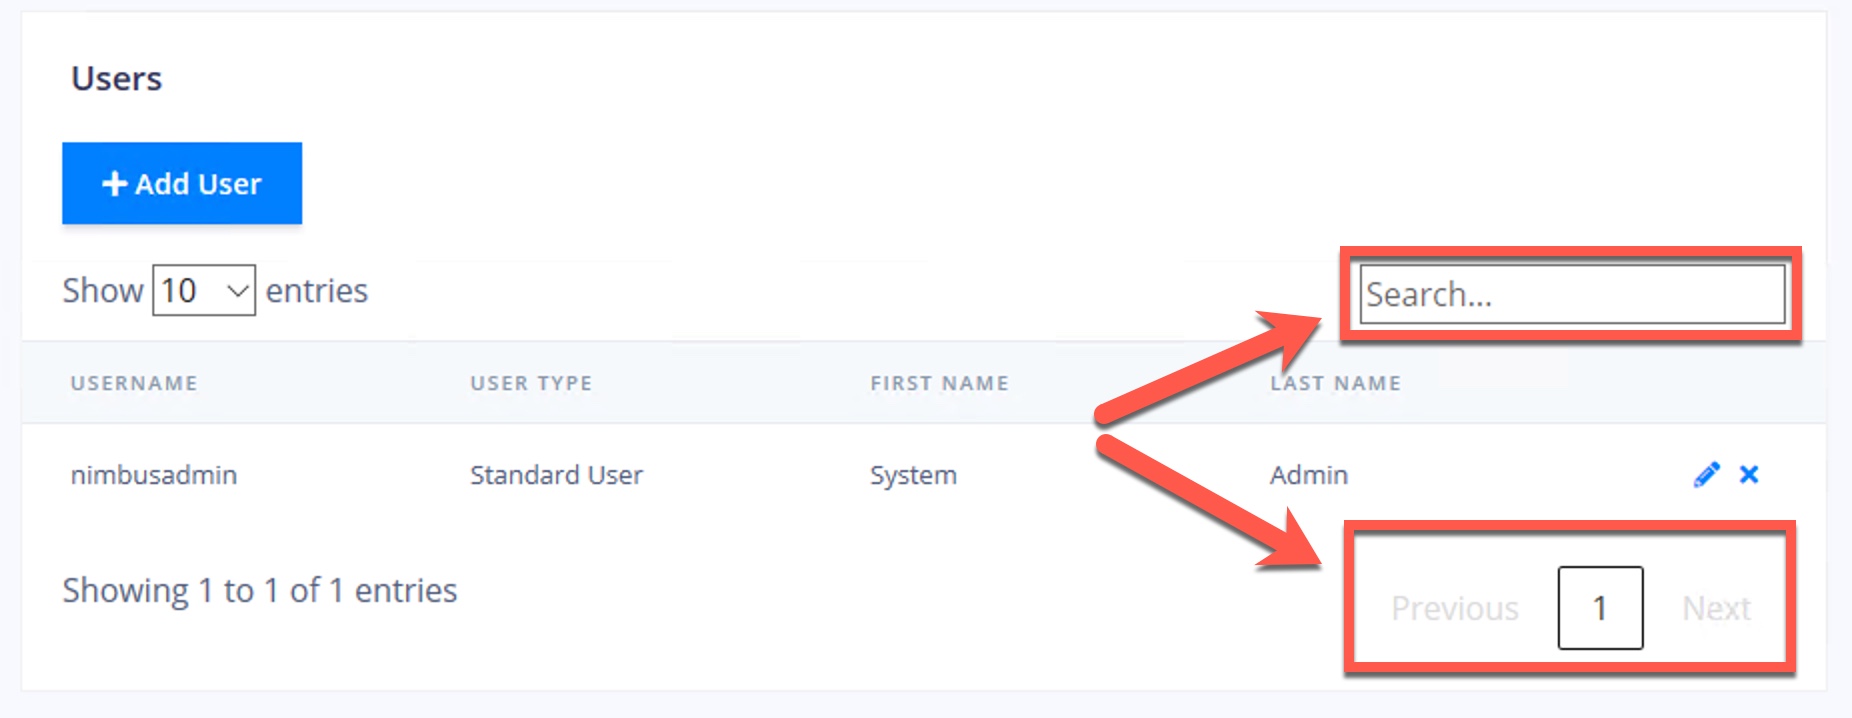
Locate the user account you would like to edit in the table, then click the pencil icon.
Change the username, first name, last name or user type.
You can optionally change the users password here too, however leaving the password and confirm password box blank, will leave the password unchanged.Click Save changes
# Changing a Users Password
Search for the user you would like to edit.
Locate the user account you would like to edit in the table, then click the pencil icon.
Set a new password in the password and confirm password boxes.
Click Save changes
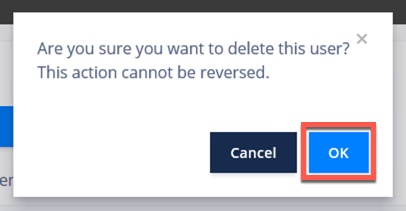
# Deleting a User Account
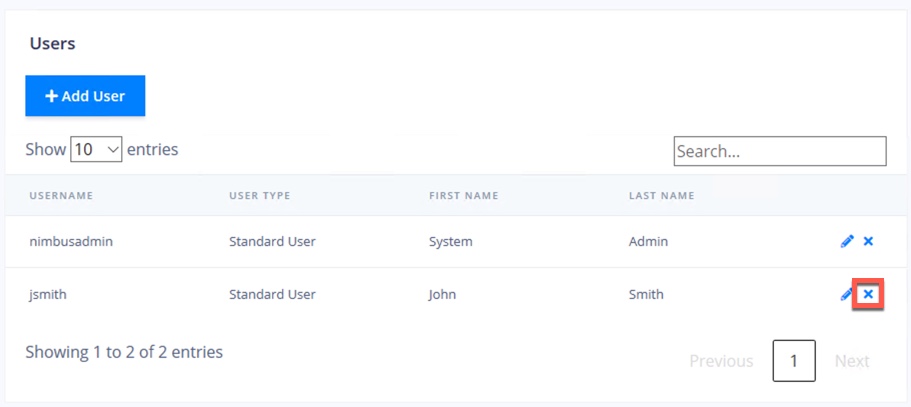
Search for the user you would like to edit.
Locate the user account you would like to edit in the table, then click the delete icon.
Confirm that you want to delete the user by clicking OK.